Windows Live Writer: Plug-ins to Format Content through CSS Classes
I like using CSS classes to format specific content of my blog posts, in order to keep my formatting centralized. I prefer HTML that looks like this over inline styles:
If you invoke the <span class="code">GetData</span> method, ...
Quickly inserting CSS directives is something you can’t easily do with Windows Live Writer. This started to annoy me while writing an article, so I came up with two simple plug-ins that do just that: Formatting selected text through CSS classes.
Plug-in 1: Quick-Insert a Predefined CSS Class
This is a very simple plug-in that stores one (1) single CSS class name, and applies it to the selected text with a single click. This is a fastest possible way to format several junks of your post with the same CSS class.
The simple assignment comes has a price, however: It takes some more work to reconfigure the used CSS class. Therefore, it mainly makes sense if you have quite a lot of similar content to format at once. Otherwise, the second plug-in is probably the better choice.
Using the Plug-in
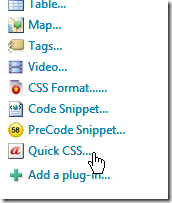
Once the plug-in is installed (instructions at the end of the article), you’ll notice an additional entry on the side bar and the Insert menu of the tool bar, saying “Quick CSS…”:
All you have to do is selecting the portion of text you’d like to format, and click on the plug-in. The configured CSS class name will be immediately applied to the selected text.
First invocation / configuration
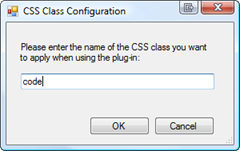
The first time you click on the plug-in, there is no formatting happening. Instead, the plug-in displays its options dialog because no CSS class has been configured yet. This dialog allows you to quickly set the CSS class that should be applied:
Subsequent clicks on the plug-in directly apply the class name you configured – this dialog is only opened automatically the first time.
Changing the Class Name
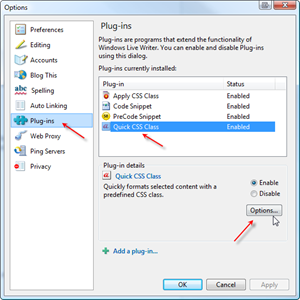
You can change the name of the used CSS class at any time. This requires a bit of work though, as you’ll have to go through Live Writer’s options dialog:
Plug-in 2: Selecting a CSS Class from a List of Class Names
This is a more flexible plug-in. It takes two clicks to format your text with a given CSS class, but it maintains a configurable list of CSS class names, and allows you to quickly select the class name to be applied from a popup.
Using the Plug-in
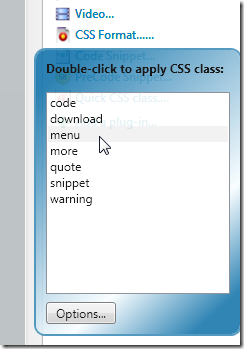
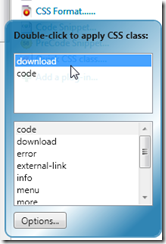
Once the plug-in is installed (instructions below), you will find a new entry saying “CSS Format…” on the side bar and Live Writer’s Insert menu. Clicking the plug-in (which causes a short delay the first time) opens a popup that lists your CSS classes in alphabetic order. In order to apply a CSS class to the selected text, just double-click a class name:
Most Recently Used Items
Note that if you have configured 10 or more CSS class names, the popup will display two lists, of which the upper list contains the 5 most recently used class names.
(I could make that feature configurable in a subsequent release, if requested.)
Configuring / Importing CSS Class Names
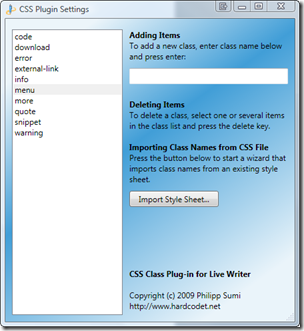
The plug-in allows you to quickly configure class names through a custom configuration dialog, and also supports importing class names directly from a CSS Style Sheet. You can open the dialog through the Popup by clicking the “Options” button:
Style Sheet Import
Clicking the Import Style Sheet button opens a file dialog that allows you to select a style sheet (probably the one you’re also using on your blog). Once selected, the plug-in imports all new class names from the style sheet.
Live Writer Bug: Reformatting Span-Tags
It appears that Live Writer has a bug when it comes to reformatting already formatted text spans. There’s currently no simple fix for this bug, so keep this in mind:
Imagine you have a preformatted junk of text that looks like this:
<span class="foo">hello</span>
Now, if you select the word “hello”, and try to assign it another CSS class (bar), you’d expect the new markup to look like this:
<span class="bar">hello</span>
Instead, Live Writer just keeps the old span, and wraps it into a second one.
<span class="foo"><span class="bar">world</span></span>
Download and Installation Instructions
Download Links
Plug-in 1: Hardcodet.LiveWriter.QuickClassInsert.dll
Plug-in 2: Hardcodet.LiveWriter.ApplyCss.dll
The second plug-in requires Microsoft .NET Framework 3.5 SP1 (download here)
Installation
In order to install a plug-in:
- Make sure Live Writer is not running
- Copy the plug-in DLL into Live Writer’s Plugins folder. Usually, this is the following path: C:Program FilesWindows Live WriterPlugins
Source Code Download for Developers
You can also download the source code of the plug-ins:


This is a great plugin and I am so appreciative of you making this available.
One question, though, when I insert a class, it essentially inserts a “” tag for the class. Is there a way to have it simply insert the class into the style that is already present?
For example if I were inserting the class “bar”:
content herecurrently becomes:
content hereis it possible to have it become:
content hereJust curious.
Either way, thanks for developing this plugin — a super help for me.
Unfortunately not – the possibilities the plug-in API delivers are terribly limited. I can’t even replace an existing CSS class through the API. Hope this will get better with a later version of Live Writer, but for now, that’s all I can offer I’m afraid.
@Philipp Sumi
That’s cool, I can’t wait until we see a new version of WLW — all the buzz has me anxious to see “Wave 4.”
Nonetheless, thanks for making the plugin (and for managing to decipher my comment despite my inability to remember the tag for code snippets)
Philipp,
Is it possible to use plugin2 to have multiple css definitions? I have several different blogs with different style sheets – so it would be nice that when I’m working on one blog it’s styles are available but not when working on a different blog, for example.
Thanks!
Jason
Jason,
No, the plug-in does not know the notion of individual style sheets – internally, it just maintains a simple list of CSS class names. You can of course import multiple style sheets, but will end up with a merged list of classes.
Philipp,
Any plans to do something like that? Or is there a simple way to purge the imported style sheet?
Jason
@Philipp Sumi
Jason,
No, this is currently not a priority for me – I’m busy with some other projects.
However: Note that for the plug-in itself, there’s no notion of a Stylesheet (or the style sheet’s formatting instructions). The plug-in only only maintains class *names*. After an import, the class names of the stylesheet have just been added to the internal list of classes and the plug-in does not know or care where the class names came from.
This means, that if you have similar stylesheets (same class names) on your blogs, your list of classes in the plug-in will work just fine for both blogs no matter which of the stylesheets you imported.
Jason, this is amazing, just what I was looking for. Thanks for developing!
Ps: How does anyone in the world run a blog without WLW? It makes me heart Microsoft more than I ever thought possible.
Thank you so much for these great tips! I have been trying to get my residential window installations company blog up and running and I believe that these tips will really help me out! Thanks again!